Cat Wheel Speedo
Here is a basic speedometer/odometer for your cat wheel. It measures the speed in m/s, and keeps the total distance travelled while it’s powered on.
You will need:
- A cat wheel
- An ESP or Arduino
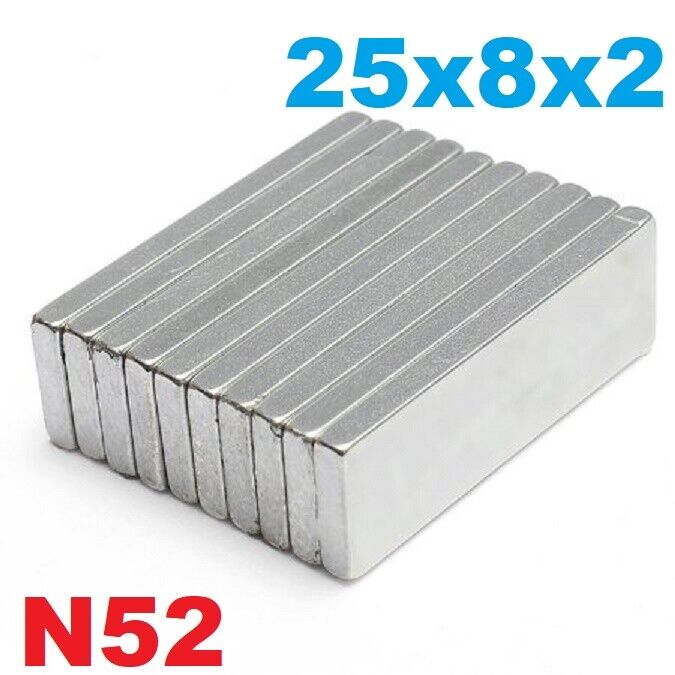
- Some strong magnets
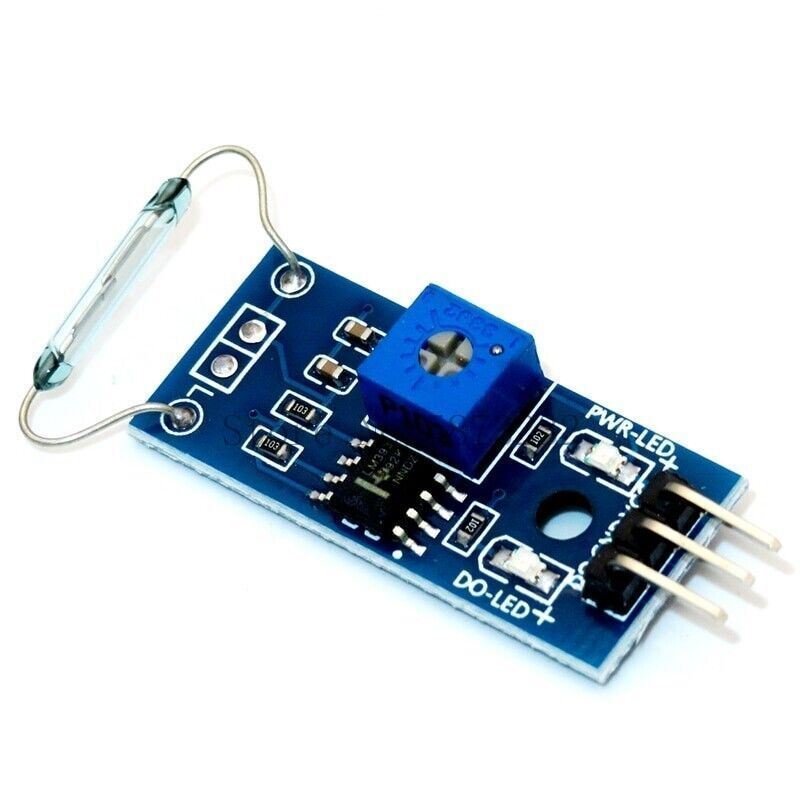
- LCD module with I2C adaptor
- double sided tape to attach the magnets and the switch to the wheel eg 3M tape
- wires, power source etc
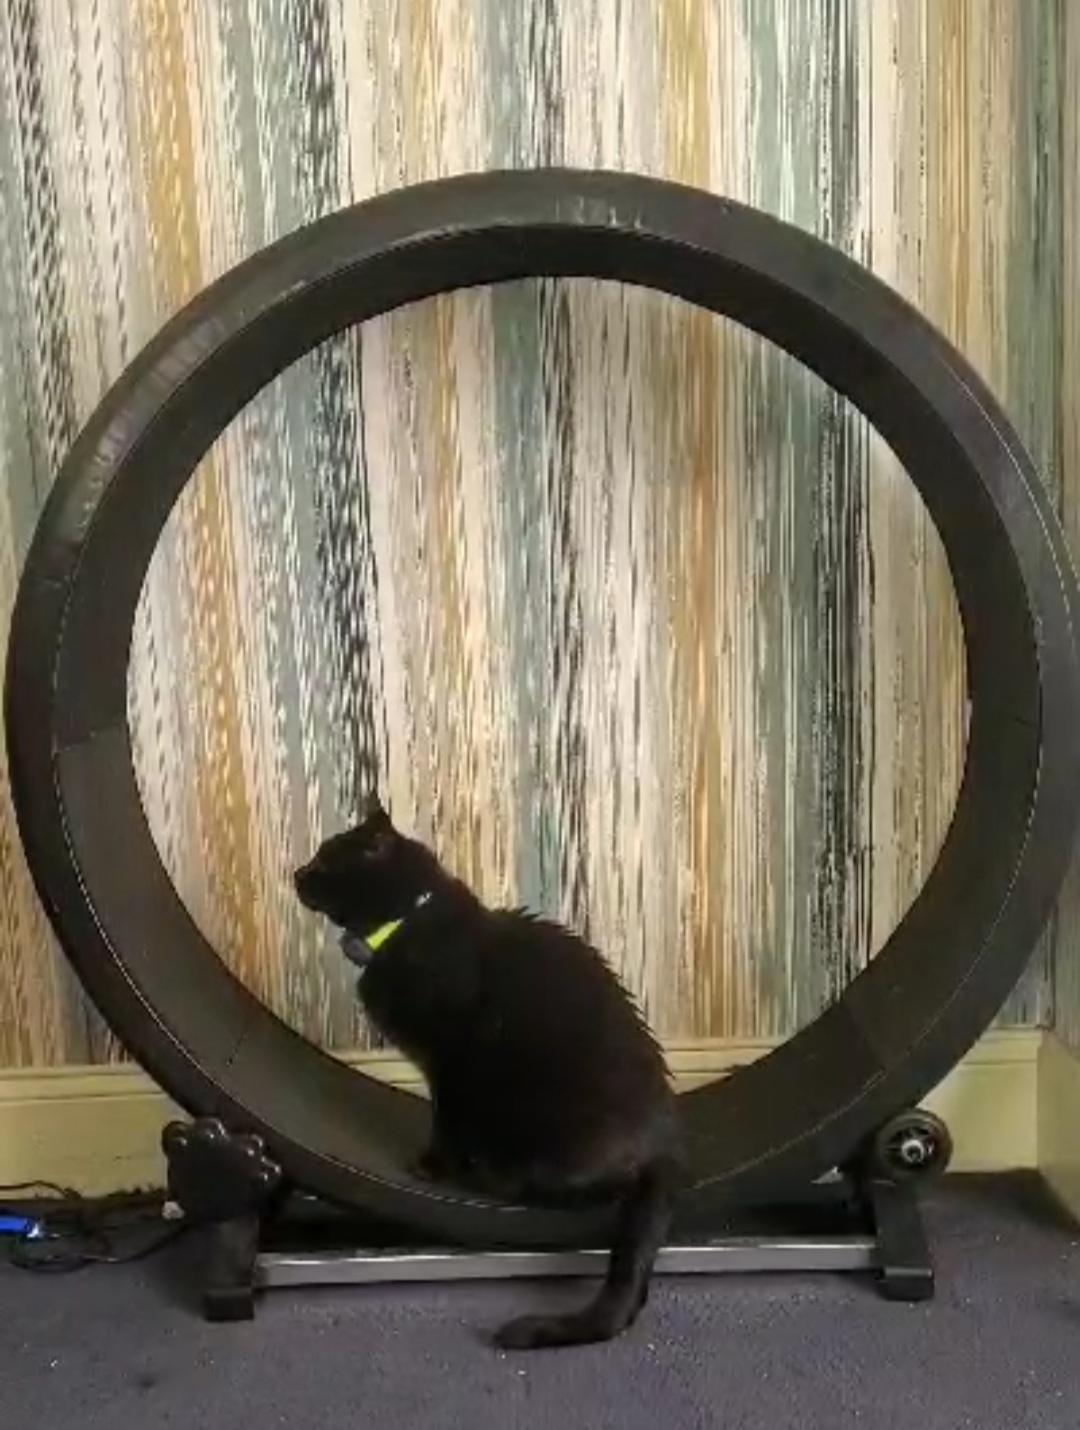
- a cat

I did have some extremely cheap magentic switches lying about, the kind that are used on alarm systems to signal if a door or window has been opened or closed. But they didn’t work great, so while the reed switch module looked a bit overkill, it worked much better.
ESP32 or Arduino?
I prefer ESP32s to Arduino these days. Most of them have pins with built-in resistors, they come with wifi and many modules have BLE, they tend to be cheaper than Arduino and they come in a vast array of shapes and sizes. You can program exactly the same as an Arduino with the IDE. Have a search online for guides on how to do this.
Setting up
You need to find a place where the magnets can be stuck at equal distances around the outside of the wheel, and you need to find a spot where the reed switch sensor can sit so the magnets pass very close by without knocking it. My cat wheel had a handy bit at the base and raised sections all around the edge of the wheel. I used a 30cm long 3-core cable to connect the reed switch module to the ESP32, so the ESP32 could sit somewhere comfortably.
Connect the reed switch to 3.3V, Ground and the DO or Data pin to a data pin on your ESP32, eg, pin 19.
| ESP32 | Reed Switch |
|---|---|
| 3.3v | V+ |
| GND | GND |
| GPIO 19 | DO |
Now measure the diameter of the inside of the wheel, I used a laser measure so super accurate - 1.08m. The circumference is π times the diameter, in my case, 3.4m. I divide this by 4, because I have 4 magnets on the wheel, which gives us a value of 0.85.
This value goes in the following line:
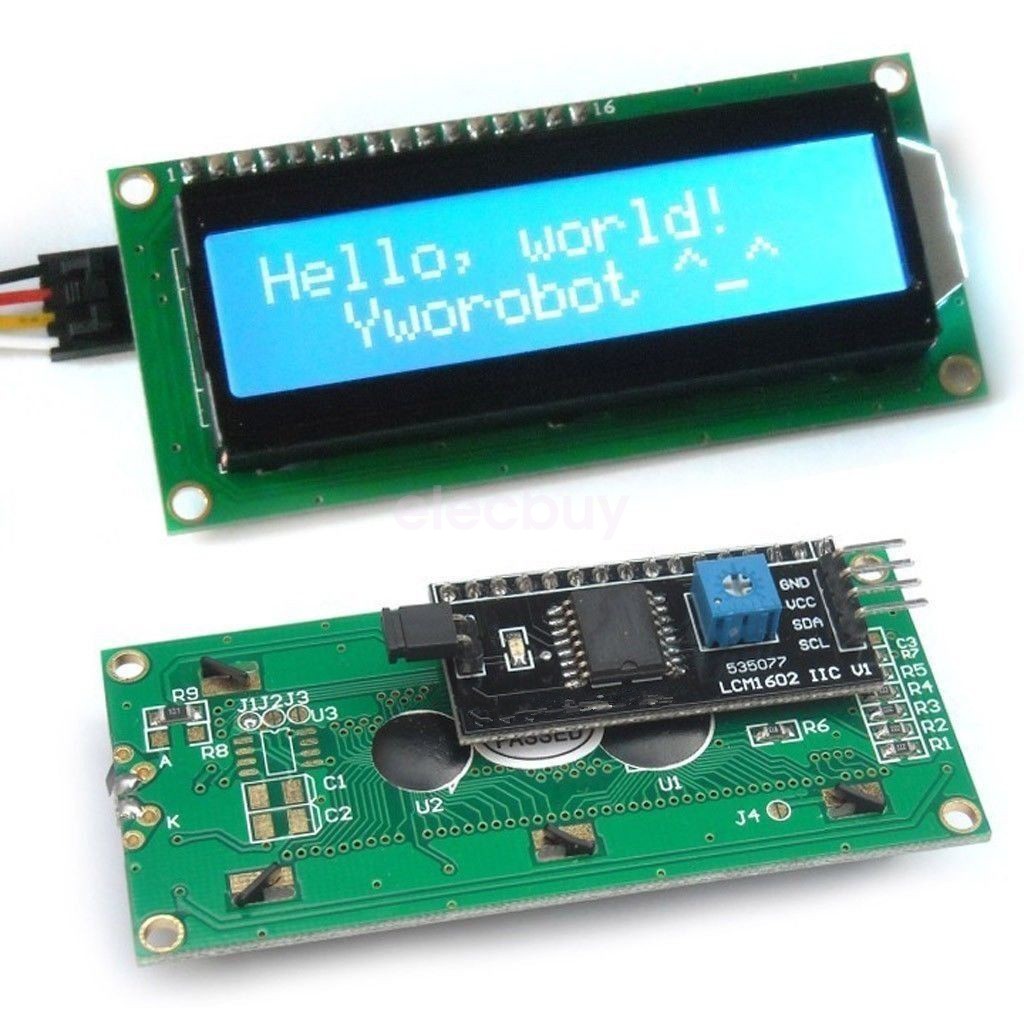
const float wheelCircumference = 0.85;Connect up an I2C LCD unit. It needs 5v, GND and SCL and SDA pins. Look up a pinout of your ESP32 model to find out which those are; it’s usually pins 21 and 22 on ESP32. Once connected you can adjust the potentiometer at the back to change the contrast.
| ESP32 | LCD I2C |
|---|---|
| 5V | V+ |
| GND | GND |
| SCL (21) | SCL |
| SDA (22) | SDA |
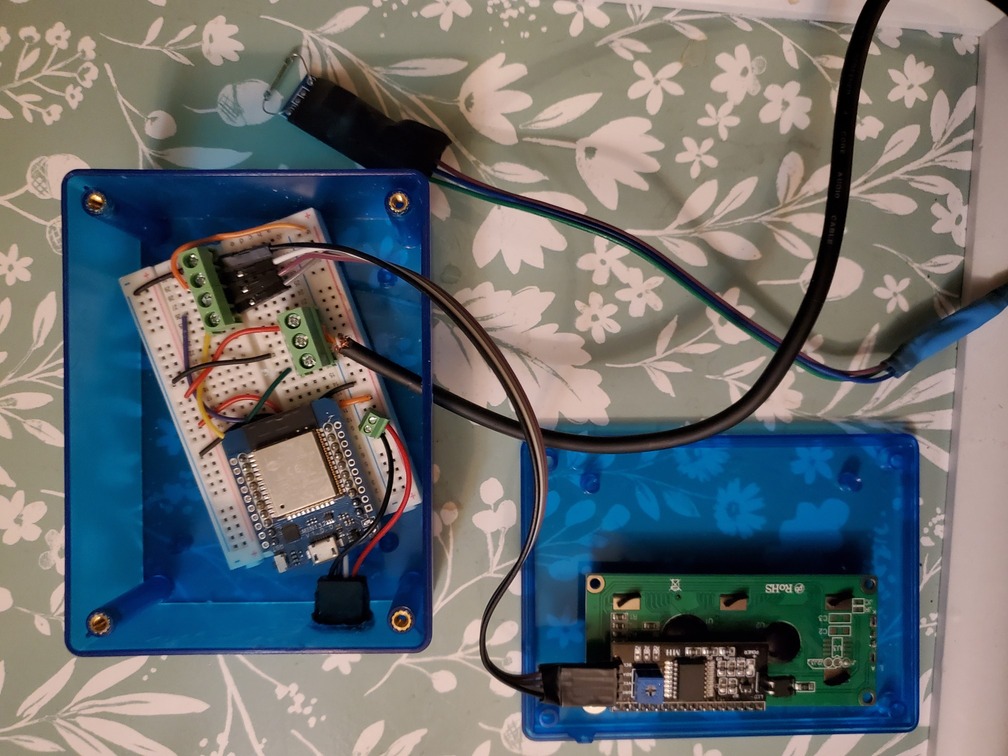
Here it is all connected up and put in a nice plastic box:
That’s all it needs - the code below (or download here) will increment a count every time a magnet passes a sensor. It will multiply that by the value you entered in wheelCircumference to work out speed and distance.
Code
I have it set so it sends all the information to the serial monitor: Number of revolutions, the count, the speed and the distance. Underneath is the code for the LCD display of speed and distance. This all just resets if you unplug or reset the device.
// A simple LCD speedo for a cat wheel.
// Change wheelCircumference to the distance between magnets on the wheel
// work out the total circumference of your wheel (diameter times pi)
// then divide that by the number of magnets.

#include <Wire.h>
#include <LiquidCrystal_I2C.h>

const int reedPin = 19;                 // Pin for the magentic sensor
const float wheelCircumference = 0.84823;  // Distance between magnets in metres
volatile int cnt = 0;     // Counts the number of wheel rotations
volatile unsigned long revolutions = 0;
unsigned long lastTime = 0;  // Time to calculate speed
float distance = 0.0;        // Total distance covered
float speed = 0.0;           // Speed in meters per second

volatile unsigned long lastTriggerTime = 0;  // Last interrupt trigger time
const unsigned long debounceDelay = 150;     // Debounce delay in milliseconds

#define I2C_SCL 22
#define I2C_SDA 21

//set up LCD display
LiquidCrystal_I2C lcd(0x27, 16, 2);  // set the LCD address to 0x27 for a 16 chars and 2 line display

void count() {
  unsigned long currentTime = millis();

  if (currentTime - lastTriggerTime > debounceDelay) {
    cnt++;
    revolutions++;                  // Increment the total revolutions count
    lastTriggerTime = currentTime;  // Update the last trigger time
  }
}

void setup() {
  Serial.begin(115200);
  Wire.begin(I2C_SDA, I2C_SCL);

  pinMode(reedPin, INPUT_PULLUP);                                   // Set reed pin as input
  attachInterrupt(digitalPinToInterrupt(reedPin), count, FALLING);  // Trigger count on rising edge
  lcd.init();                                                       // initialise the LCD
  lcd.backlight();                                                  // Light the beacons
}


void loop() {
  // Every 5 seconds, calculate the speed and distance
  unsigned long currentTime = millis();

  if (currentTime - lastTime >= 5000) {
    float timeInSeconds = (currentTime - lastTime) / 1000.0;

    // Calculate speed in meters per second
    speed = (cnt * wheelCircumference) / timeInSeconds;

    // Calculate total distance
    distance += cnt * wheelCircumference;

    // Go to the Write subroutine to output the results
    Write();

    // Reset the count and update the last time
    cnt = 0;
    lastTime = currentTime;
  }
}


//Writes the results to the serial monitor and the LCD
void Write() {

  // information for Serial Monitor
  Serial.println("Data:");
  Serial.print("Revolutions: ");
  Serial.println(revolutions);
  Serial.print("cnt: ");
  Serial.println(cnt);
  Serial.print("Current Speed: ");
  Serial.println(speed);
  Serial.print("Distance: ");
  Serial.println(distance);
  Serial.println(" -- ");
  // print to LCD
  lcd.clear();
  lcd.setCursor(0, 0);
  lcd.print("Speed: ");
  lcd.print(speed);
  lcd.print("m/s");
  lcd.setCursor(0, 1);
  lcd.print("Dist: ");
  lcd.print(distance);
  lcd.print("m");
  //lcd.print("count: ");
  //lcd.print(revolutions);
}
Training the cat
You’re on your own with this one.. I found this video really helpful; as with all things it takes regular perseverence. Mine got the hang of it after a fortnight but it can take up to 6 weeks of coaxing.